Guide to modern Neovim setup, 2021.
If you’ve been programming for some time, you’ve most likely heard about Vim. The legendarily hard to master text editor that seems to be so prestigious, all the “cool kids” use it.
Of course, most of that is an utter bullshit, but at some point you might want to try it anyway. Maybe you’ve wanted to check it out for a long time now? Maybe you’re just curious to check what it is about? Or maybe you just have a free weekend that you don’t have any plans for yet? I hope this guide will help you out, as we’ll delve into Neovim (a close relative to Vim) and set it up in a way it makes sense in the year of 2021.
The goals
I wanted to create an article to which I could guide my future self and anyone interested in setting up their Neovim. Likewise, I hope it’ll be of help to both new users and to intermediate neovimmers.
This article doesn’t mean to teach you how to use Vim. There’s a great ton of other resources. I especially highly recommend running vimtutor in your Terminal (or looking it up on the Internet) and this blogpost by Daniel Miessler “Learn Vim For the Last Time”.
This guide’s goal is to create a Neovim setup that will have the most useful and most required features for a modern programming setup. However, I need to stress my biases: I am mostly a backend web developer and I switch between Neovim and Visual Studio Code frequently. As such, this guide will provide:
- solid navigation between files and places of interest,
- auto-completion,
- code actions (also known as quick fixes),
- some basic appearance setup (themes, status lines, bar lines).
It will not go into:
- using Neovim,
- debuggers,
- profilers,
- and any other thing that might fit into an IDE more than a code editor.
I will try to point to resources, and I hope that at the end of this guide you’ll have enough knowledge to set those things yourself and know where to look for them.
NOTE: A lot of more detailed instructions and information are written as comments inside the code blocks. Don’t skip them!
Here’s a preview of what you can expect to see at the end of this guide.
Installing Neovim
Let’s start by installing Neovim. Make sure to install at least version 0.5 as we’ll be using some crucial features introduced in that version.
Installing Neovim · neovim/neovim Wiki
Configuring Neovim
The way to configure your Vim or Neovim are files colloquially knows as “dotfiles” (because they often start with a dot, or they live in directories starting with a dot). Vim uses special configuration files with .vim extension. However, Neovim (starting with version 0.5) introduced the ability to use Lua programming language to configure the editor. This is the way we’ll be using in this guide.
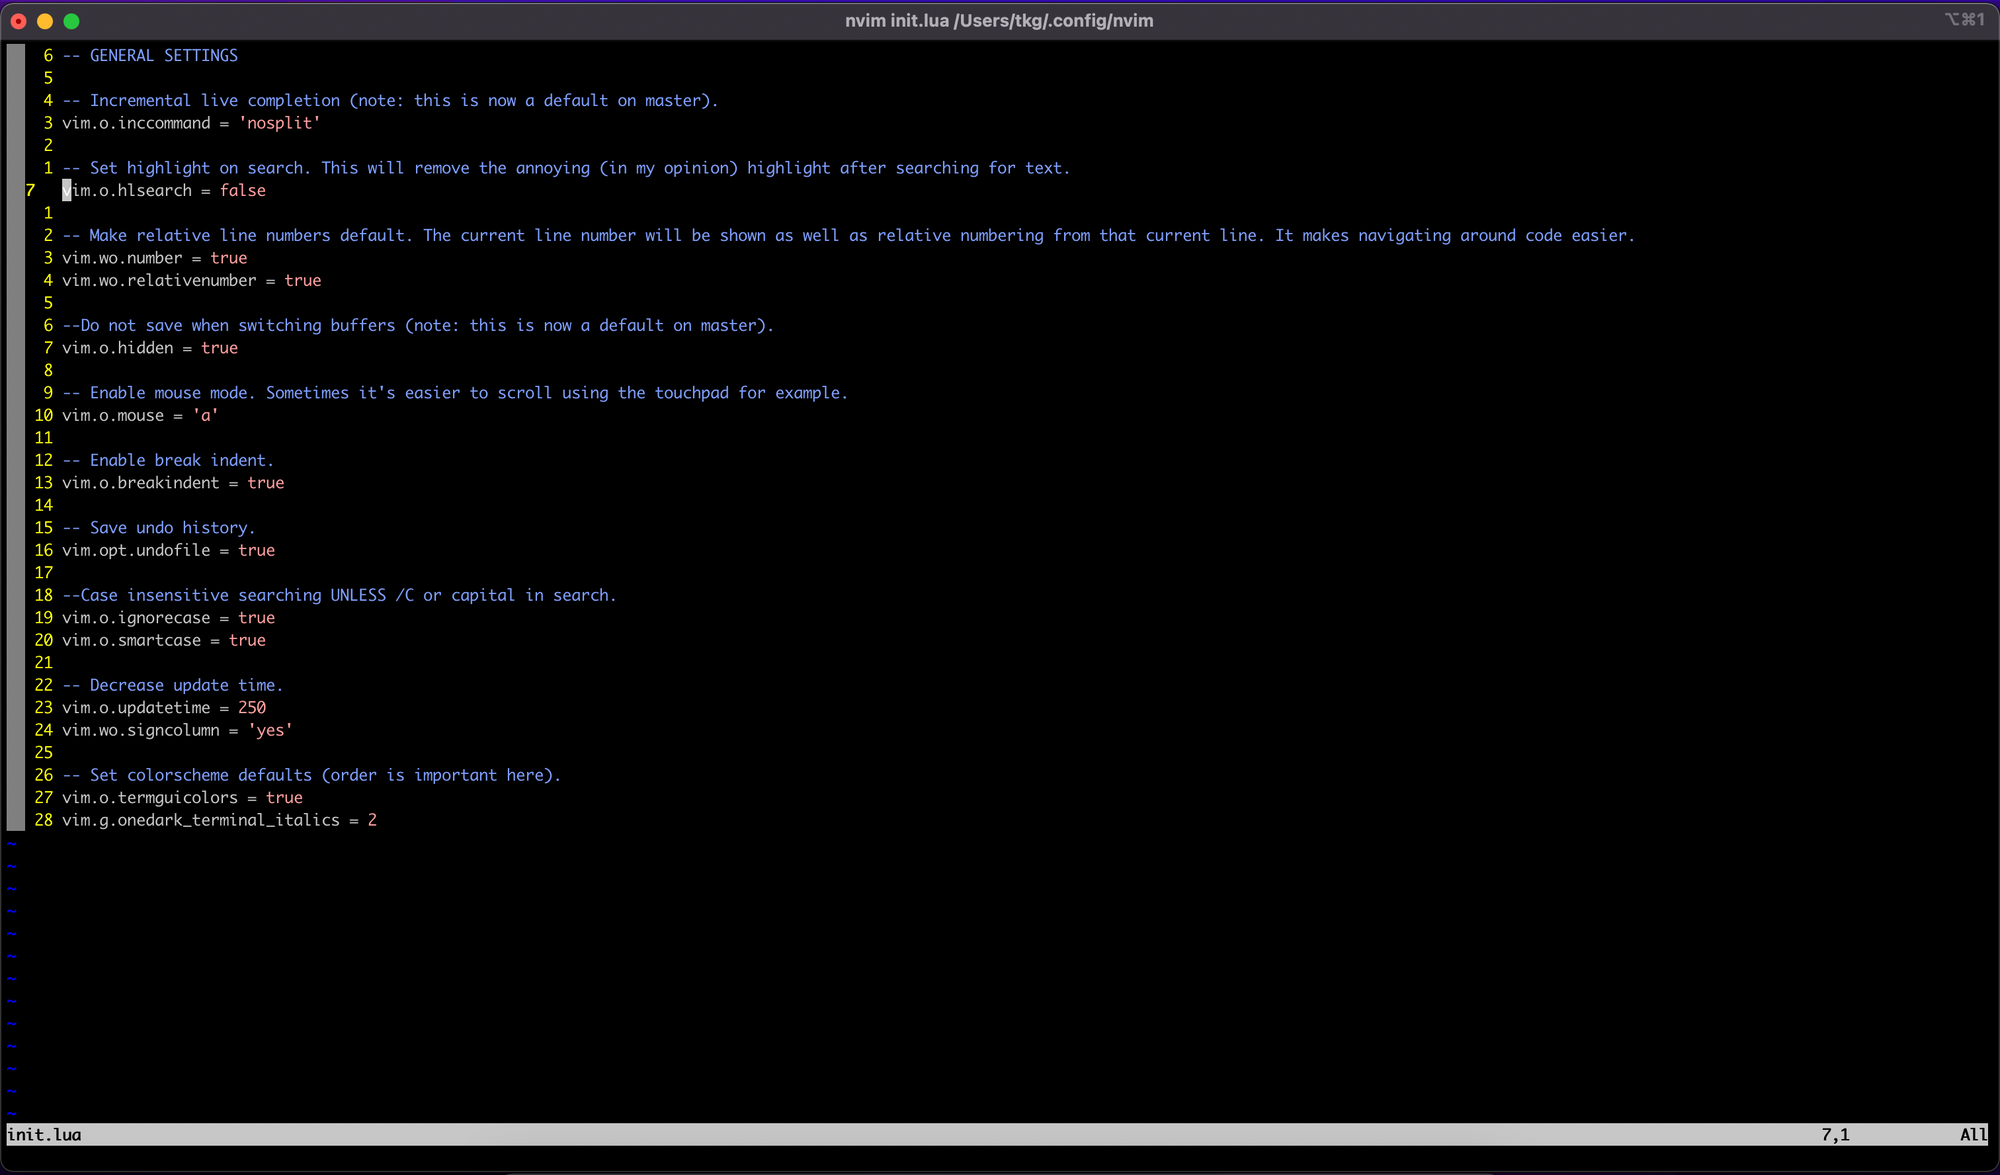
The exact location where your configuration file should live in will depend on your operating system, but for macOS, you can find it in ~/.config/nvim/init.lua. If that file doesn’t exist — create it.
-- Incremental live completion (note: this is now a default on master).
vim.o.inccommand = 'nosplit'

-- Set highlight on search. This will remove the highlight after searching for text.
vim.o.hlsearch = false

-- Make relative line numbers default. The current line number will be shown as well as relative numbering from that current line. It makes navigating around code easier.
vim.wo.number = true
vim.wo.relativenumber = true

-- Do not save when switching buffers (note: default on master).
vim.o.hidden = true

-- Enable mouse mode. Sometimes it's easier to scroll using the touchpad for example.
vim.o.mouse = 'a'

-- Enable break indent.
vim.o.breakindent = true

-- Save undo history.
vim.opt.undofile = true

-- Case insensitive searching unless /C or capital in search.
vim.o.ignorecase = true
vim.o.smartcase = true

-- Decrease update time.
vim.o.updatetime = 250
vim.wo.signcolumn = 'yes'

-- Set colorscheme defaults (order is important here).
vim.o.termguicolors = true
vim.g.onedark_terminal_italics = 2
vim.o.background = 'dark'
vim.cmd [[colorscheme moonfly]]

-- Set status bar settings, it might throw errors because we haven't installed the `moonfly` theme yet, so don't worry about that.
vim.g.lightline = {
  colorscheme = 'moonfly',
  active = { left = { { 'mode', 'paste' }, { 'gitbranch', 'readonly', 'filename', 'modified' } } },
  component_function = { gitbranch = 'fugitive#head' },
}

-- Highlight on yank (copy). It will do a nice highlight blink of the thing you just copied.
vim.api.nvim_exec(
  [[
  augroup YankHighlight
    autocmd!
    autocmd TextYankPost * silent! lua vim.highlight.on_yank()
  augroup end
]],
  false
)

-- Y yank until the end of line  (note: this is now a default on master)
vim.api.nvim_set_keymap('n', 'Y', 'y$', { noremap = true })

-- Set dark theme if macOS theme is dark, light otherwise.
local theme = vim.fn.system("defaults read -g AppleInterfaceStyle")
if (string.find(theme, 'Dark')) then
	vim.o.background = 'dark'
	vim.cmd [[colorscheme moonfly]]
else
	vim.o.background = 'light'
	vim.cmd [[colorscheme morning]]
end
You can save your init.lua file now. When you open nvim again — it should successfully load your configuration. You can test if scrolling and selecting text with your mouse works now, or if line numbers are shown in a relative numbering scheme.
Managing plugins
Just like all the other modern code editors, Neovim supports plugins (called extensions in VS Code). There are multiple different ways how you can go about extending the functionality of your editor, but similarly to how you’d install dependencies for the programming language of your choice — we’ll use a dependency manager. There are quite a few of them, with the best known and used being: vim-plug, packer and pathogen. We’ll be using packer in this guide.
Let’s make sure our config files are easy to maintain, so let’s create a lua/plugins.lua file (create a folder called lua next to your init.lua and put that file there).
-- PLUGINS

-- Install packer. You don't have to necessarily understand this code. Just know that it will grab packer from the Internet and install it for you.
local install_path = vim.fn.stdpath 'data' .. '/site/pack/packer/start/packer.nvim'

if vim.fn.empty(vim.fn.glob(install_path)) > 0 then
  vim.fn.execute('!git clone https://github.com/wbthomason/packer.nvim ' .. install_path)
end

vim.api.nvim_exec(
  [[
  augroup Packer
    autocmd!
    autocmd BufWritePost init.lua PackerCompile
  augroup end
]],
  false
)

-- Here we can declare the plugins we'll be using.
local use = require('packer').use
require('packer').startup(function()
  use 'wbthomason/packer.nvim' -- Package manager itself.
  use 'tpope/vim-fugitive' -- Git commands for nvim.
  use 'tpope/vim-commentary' -- Use "gc" to comment lines in visual mode. Similarly to cmd+/ in other editors.
  use 'tpope/vim-surround' -- A great tool for adding, removing and changing braces, brackets, quotes and various tags around your text.
  use { 'nvim-telescope/telescope.nvim', requires = { 'nvim-lua/plenary.nvim' } } -- UI to select things (files, search results, open buffers...)
  use { 'romgrk/barbar.nvim', requires = {'kyazdani42/nvim-web-devicons'} } -- A bar that will show at the top of you nvim containing your open buffers. Similarly to how other editors show tabs with open files.
  use 'bluz71/vim-moonfly-colors' -- A theme I particularly like.
  use 'itchyny/lightline.vim' -- Fancier status line with some information that will be displayed at the bottom.
  use { 'lewis6991/gitsigns.nvim', requires = { 'nvim-lua/plenary.nvim' } } -- Adds git related info in the signs columns (near the line numbers) and popups.
  use 'nvim-treesitter/nvim-treesitter' -- Highlight, edit, and navigate code using a fast incremental parsing library. Treesitter is used by nvim for various things, but among others, for syntax coloring. Make sure that any themes you install support treesitter!
  use 'nvim-treesitter/nvim-treesitter-textobjects' -- Additional textobjects for treesitter.
  use 'neovim/nvim-lspconfig' -- Collection of configurations for built-in LSP client.
  use 'hrsh7th/nvim-cmp' -- Autocompletion plugin.
  use 'hrsh7th/cmp-nvim-lsp'
  use 'saadparwaiz1/cmp_luasnip'
  use 'L3MON4D3/LuaSnip' -- Snippets plugin.
end)

-- luasnip setup (you can leave this here or move it to its own configuration file in `lua/plugs/luasnip.lua`.)
luasnip = require 'luasnip'
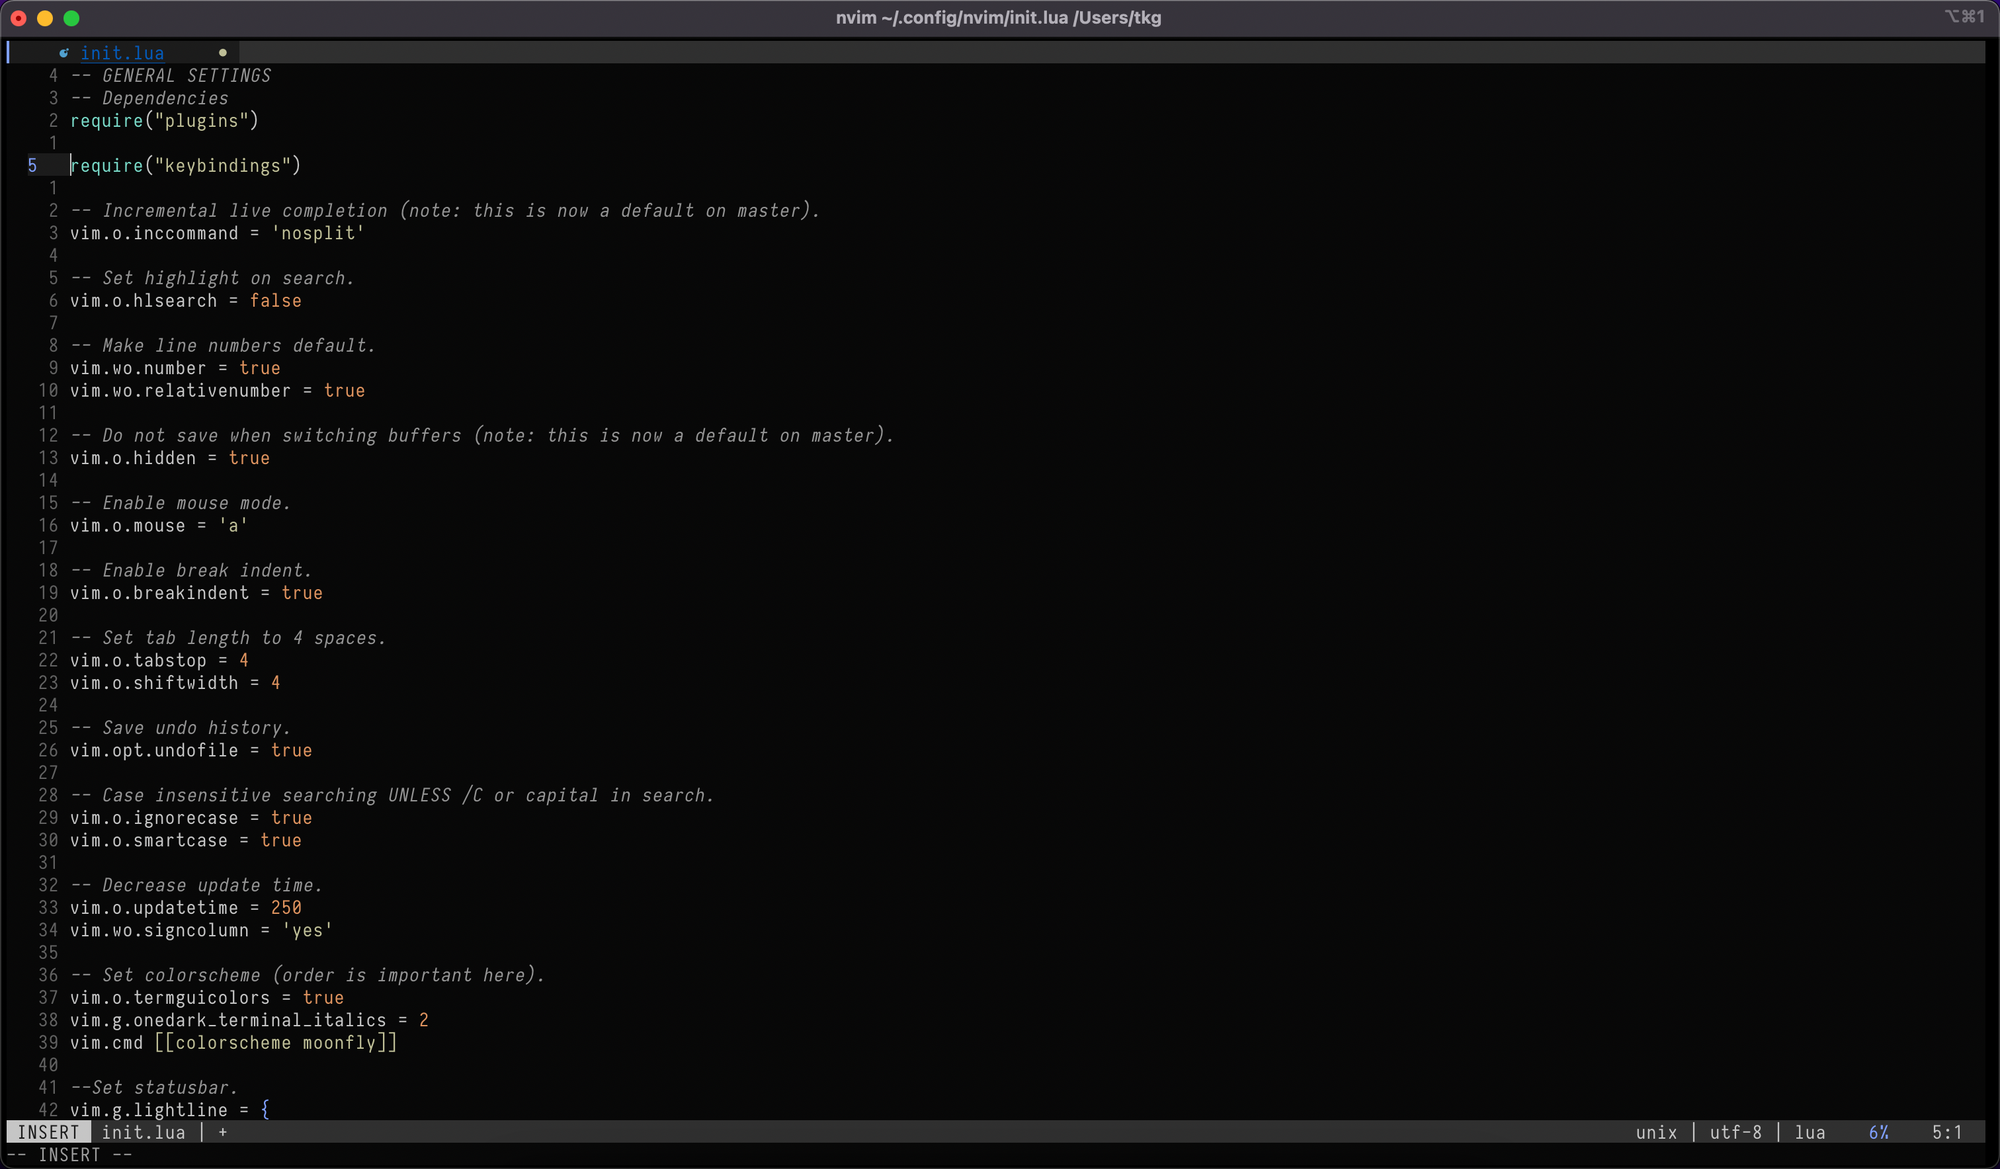
Now let’s go back to the init.lua file and require this second configuration. At the top of the file, add this piece of code.
-- GENERAL SETTINGS
-- Dependencies

require("plugins")

-- ...the rest of the file is below.
Nicely done. You can install these plugins by running :PackerInstall in your Neovim or running nvim +PackerInstall in your shell. It might fail the first time, because it will try to use packer to download packages while installing packer itself, so just run it twice if you’ll get errors the first time.
Note: If you want to check the full dotfiles to make sure your configuration looks fine (or just grab it), you can find them here: https://github.com/galkowskit/dotfiles/tree/legacy_config/nvim.
Note that there is a new configuration for 2022 inmaster, loosely based on "NeoVim from Scratch" YouTube playlist.
At this point, you should have your Neovim properly themed. One issue you might see, is the lacking icons (or rather the “?” that replace them). To fix this, you’ll have to install a font that includes those icons. You can either patch your font of choice or grab one that is already done for you. You can find them on https://www.nerdfonts.com/font-downloads. I recommend Fira Code, Cascadia Code and Iosevka, but to each its own!
Keybindings
Next step will be to set up some basic keybindings (especially the leader key). Again, let’s separate that into its own file. Create lua/keybindings.lua a file with this content.
-- KEYBINDINGS
-- Plugin specific keybindings are in the plugin's config files.

-- Remap space as leader key. Leader key is a special key that will allow us to make some additional keybindings. I'm using a spacebar, but you can use whatever you'd wish. We'll use it (for example) for searching and changing files (by pressing spacebar, then `s` and then `f`).
vim.api.nvim_set_keymap('', '<Space>', '<Nop>', { noremap = true, silent = true })
vim.g.mapleader = ' '
vim.g.maplocalleader = ' '

-- Remap for dealing with word wrap. In general, the `nvim_set_keymap` is the function we can use to create any keymap you'd wish. I tend to keep those related to the whole editor here, while leaving the ones for specific plugins to their own configuration files. That way if I ever remove or change plugins I can keep my keybindings clean.
vim.api.nvim_set_keymap('n', 'k', "v:count == 0 ? 'gk' : 'k'", { noremap = true, expr = true, silent = true })
vim.api.nvim_set_keymap('n', 'j', "v:count == 0 ? 'gj' : 'j'", { noremap = true, expr = true, silent = true })
And exactly as the last time, we need to require this configuration file in the main init.lua.
-- GENERAL SETTINGS
-- Dependencies
require("plugins")
require("keybindings")

-- ...the rest of the file is below.
Language Server Protocol
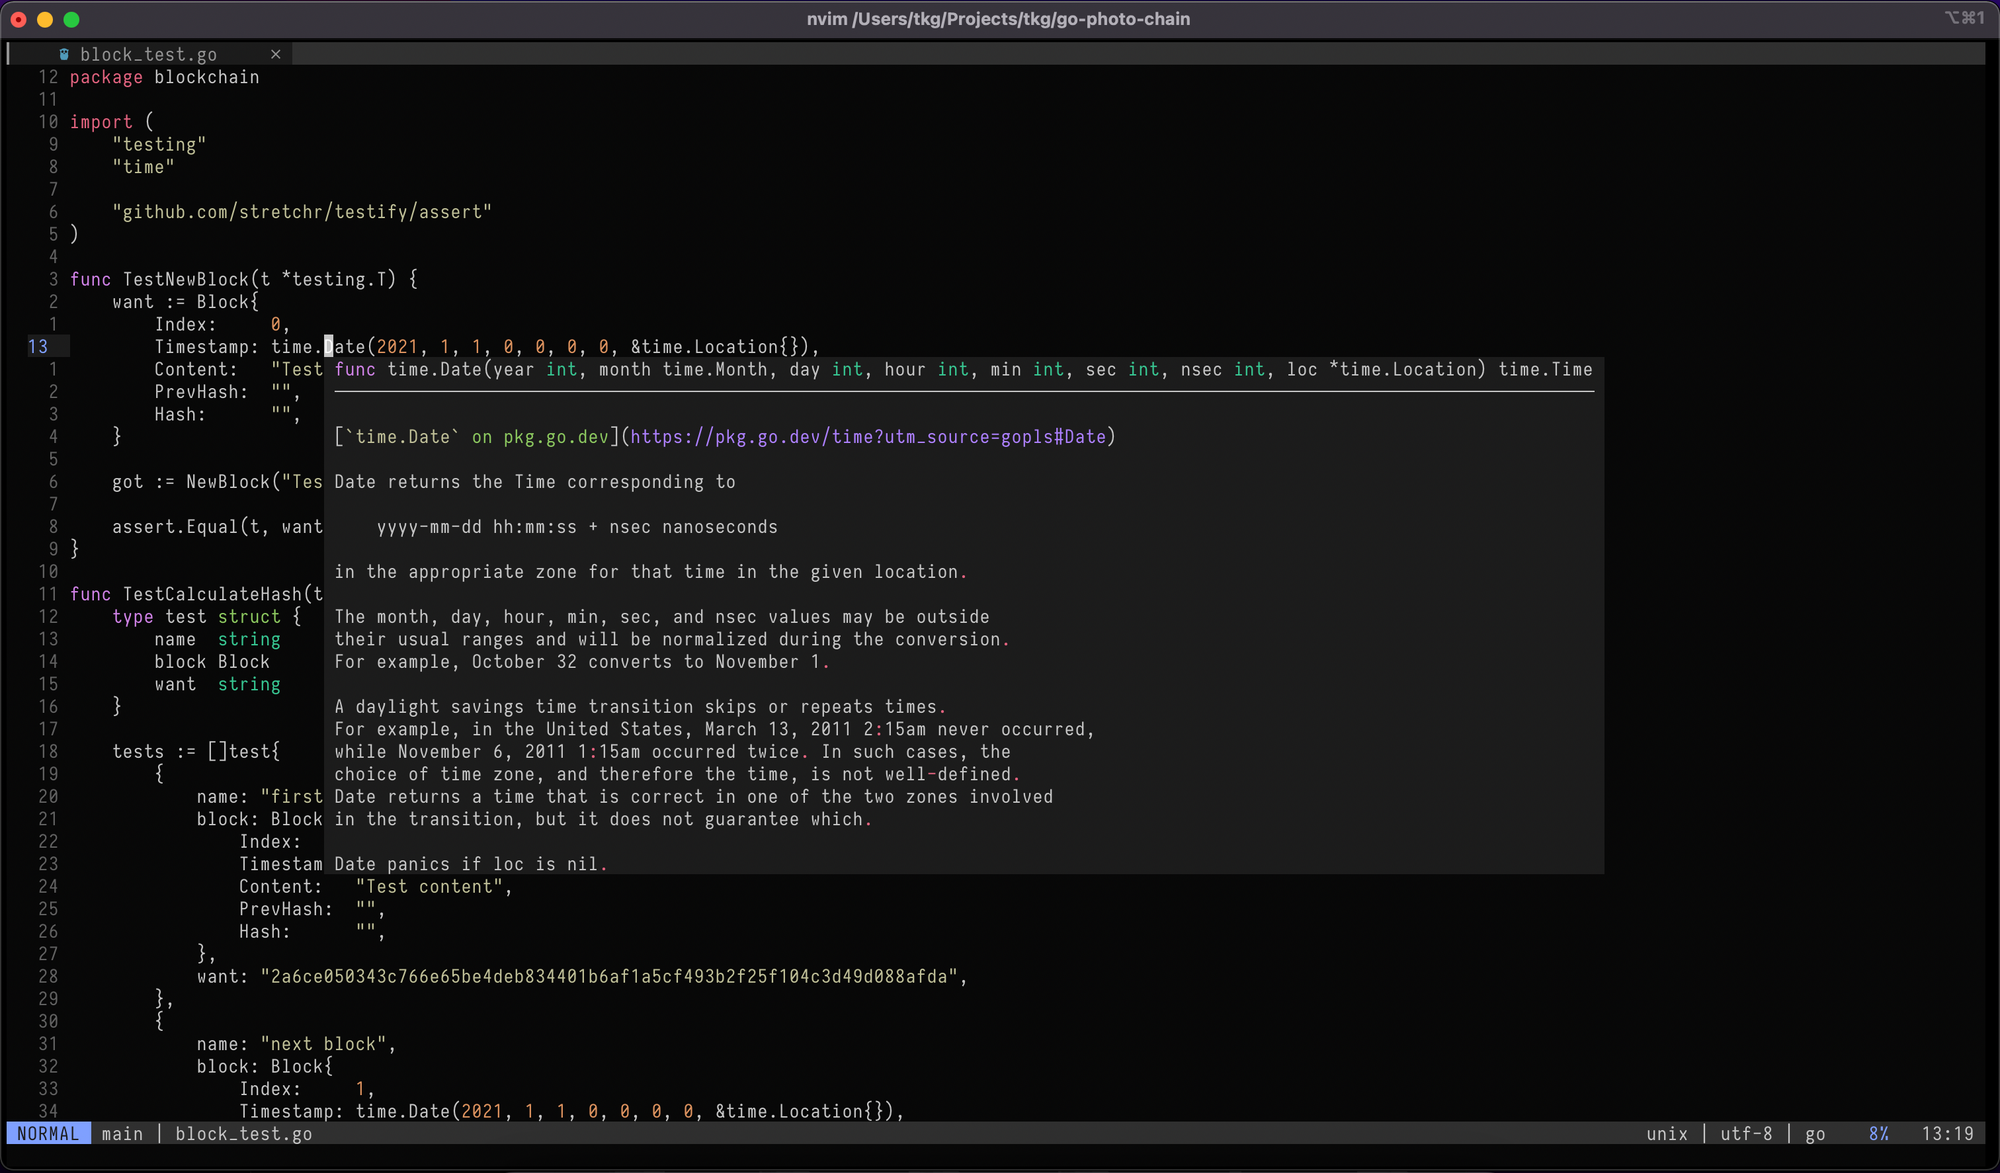
Language Server Protocol is a way for the programming language to notify any IDE or text editor about itself. Things like function definitions, code completion, quick code actions, errors and more can now be provided agnostically from the IDE itself. VS Code uses Language Server Protocol very heavily, especially for TypeScript support, but more and more languages also provide their own LSP implementations. Neovim supports the usage of the LSPs since version 0.5.
Let’s add some additional config to our configuration files and then let’s go through it together, especially through keybindings and how to install LSPs. Similarly to how we did it for other settings, let’s create a lua/lsp.lua file and require it afterwards in the init.lua file. You should know the drill by now.
-- LSP settings
local nvim_lsp = require 'lspconfig'
local on_attach = function(_, bufnr)
  vim.api.nvim_buf_set_option(bufnr, 'omnifunc', 'v:lua.vim.lsp.omnifunc')

-- Sets up all of the keybindings that we will need for navigating the code and using features like getting documentation tooltips or quick actions. We'll go through them in more detail in a moment.
  local opts = { noremap = true, silent = true }
  vim.api.nvim_buf_set_keymap(bufnr, 'n', 'gD', '<cmd>lua vim.lsp.buf.declaration()<CR>', opts)
  vim.api.nvim_buf_set_keymap(bufnr, 'n', 'gd', '<cmd>lua vim.lsp.buf.definition()<CR>', opts)
  vim.api.nvim_buf_set_keymap(bufnr, 'n', 'K', '<cmd>lua vim.lsp.buf.hover()<CR>', opts)
  vim.api.nvim_buf_set_keymap(bufnr, 'n', 'gi', '<cmd>lua vim.lsp.buf.implementation()<CR>', opts)
  vim.api.nvim_buf_set_keymap(bufnr, 'n', '<C-k>', '<cmd>lua vim.lsp.buf.signature_help()<CR>', opts)
  vim.api.nvim_buf_set_keymap(bufnr, 'n', '<leader>wa', '<cmd>lua vim.lsp.buf.add_workspace_folder()<CR>', opts)
  vim.api.nvim_buf_set_keymap(bufnr, 'n', '<leader>wr', '<cmd>lua vim.lsp.buf.remove_workspace_folder()<CR>', opts)
  vim.api.nvim_buf_set_keymap(bufnr, 'n', '<leader>wl', '<cmd>lua print(vim.inspect(vim.lsp.buf.list_workspace_folders()))<CR>', opts)
  vim.api.nvim_buf_set_keymap(bufnr, 'n', '<leader>D', '<cmd>lua vim.lsp.buf.type_definition()<CR>', opts)
  vim.api.nvim_buf_set_keymap(bufnr, 'n', '<leader>rn', '<cmd>lua vim.lsp.buf.rename()<CR>', opts)
  vim.api.nvim_buf_set_keymap(bufnr, 'n', 'gr', '<cmd>lua vim.lsp.buf.references()<CR>', opts)
  vim.api.nvim_buf_set_keymap(bufnr, 'n', '<leader>ca', '<cmd>lua vim.lsp.buf.code_action()<CR>', opts)
  vim.api.nvim_buf_set_keymap(bufnr, 'n', '<leader>e', '<cmd>lua vim.lsp.diagnostic.show_line_diagnostics()<CR>', opts)
  vim.api.nvim_buf_set_keymap(bufnr, 'n', '[d', '<cmd>lua vim.lsp.diagnostic.goto_prev()<CR>', opts)
  vim.api.nvim_buf_set_keymap(bufnr, 'n', ']d', '<cmd>lua vim.lsp.diagnostic.goto_next()<CR>', opts)
  vim.api.nvim_buf_set_keymap(bufnr, 'n', '<leader>q', '<cmd>lua vim.lsp.diagnostic.set_loclist()<CR>', opts)
  vim.api.nvim_buf_set_keymap(bufnr, 'n', '<leader>so', [[<cmd>lua require('telescope.builtin').lsp_document_symbols()<CR>]], opts)
  vim.cmd [[ command! Format execute 'lua vim.lsp.buf.formatting()' ]]
end

-- nvim-cmp supports additional completion capabilities.
local capabilities = vim.lsp.protocol.make_client_capabilities()
capabilities = require('cmp_nvim_lsp').update_capabilities(capabilities)

-- Enable the following language servers. If you ever find yourself needing another programming language support, you'll have to find its LSP, add it to this list and make sure it is installed in your system! We'll go through installing tsserver together for TypeScript support.
local servers = { 'clangd', 'rust_analyzer', 'pyright', 'tsserver', 'gopls' }
for _, lsp in ipairs(servers) do
  nvim_lsp[lsp].setup {
    on_attach = on_attach,
    capabilities = capabilities,
  }
end

-- Make runtime files discoverable to the server.
local runtime_path = vim.split(package.path, ';')
table.insert(runtime_path, 'lua/?.lua')
table.insert(runtime_path, 'lua/?/init.lua')

-- Set completeopt to have a better completion experience.
vim.o.completeopt = 'menuone,noselect'
Installing Language Servers
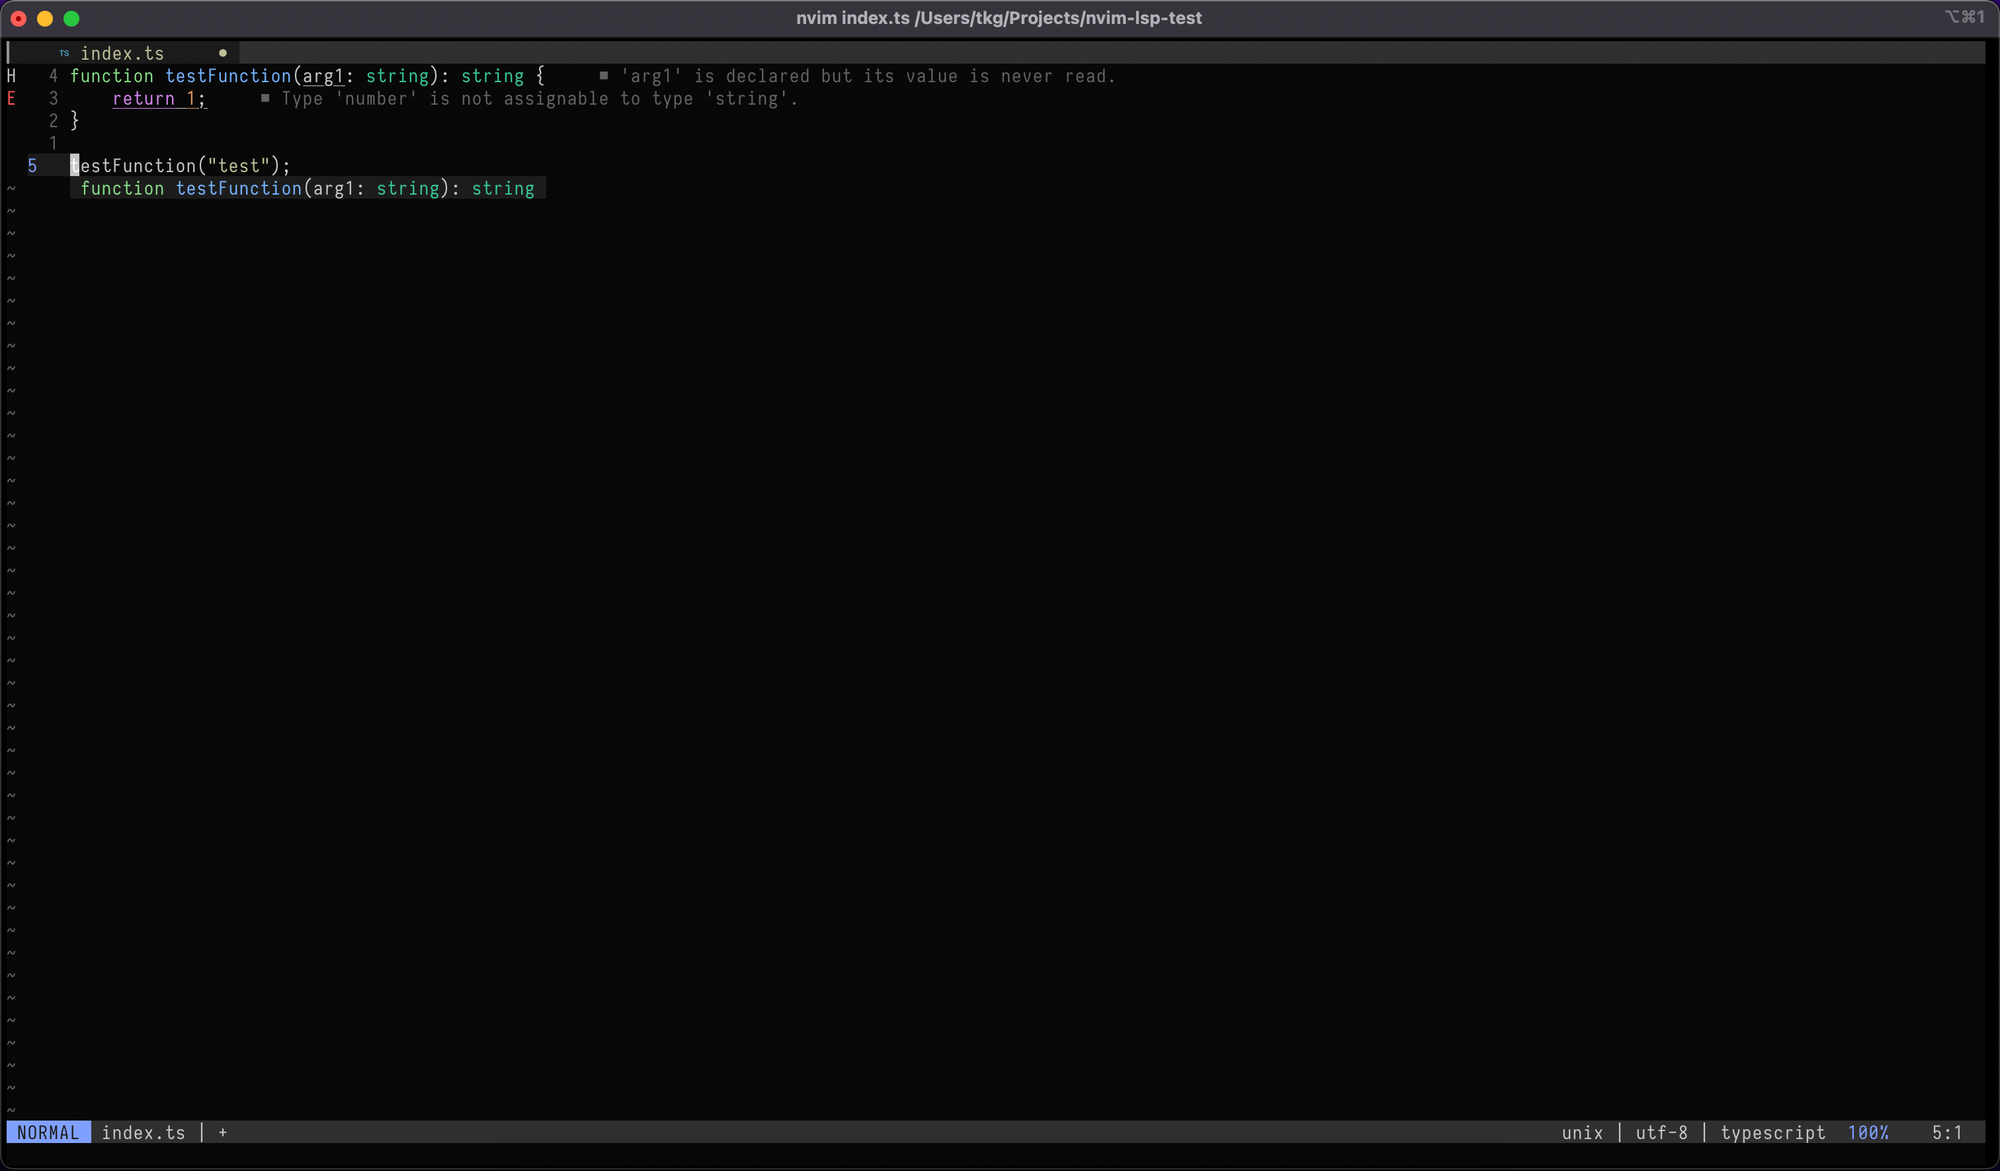
Let’s get started with actually installing a language server, so you can see for yourself how this process looks like. Let’s take TypeScript as an example, in the lsp.lua file we’ve declared that we’ll want to use tsserver (that’s the TypeScript’s LSP). However, we might need to install it first.
Tip: You can use :checkhealth to make your Neovim to make a self-diagnostic and inform you about any errors like missing dependencies or misconfigurations. This will also show a list of LSPs with either ERROR or INFO next to them. If you see a “XYZ is not an executable” it means you need to install that LSP if you wish to use it.For TypeScript, let’s install npm install -g typescript-language-server typescript. You might not need to install typescript globally, it should be able to pick it up from the node_modules of a project, but I’ve always had problems with it, so your mileage may vary.
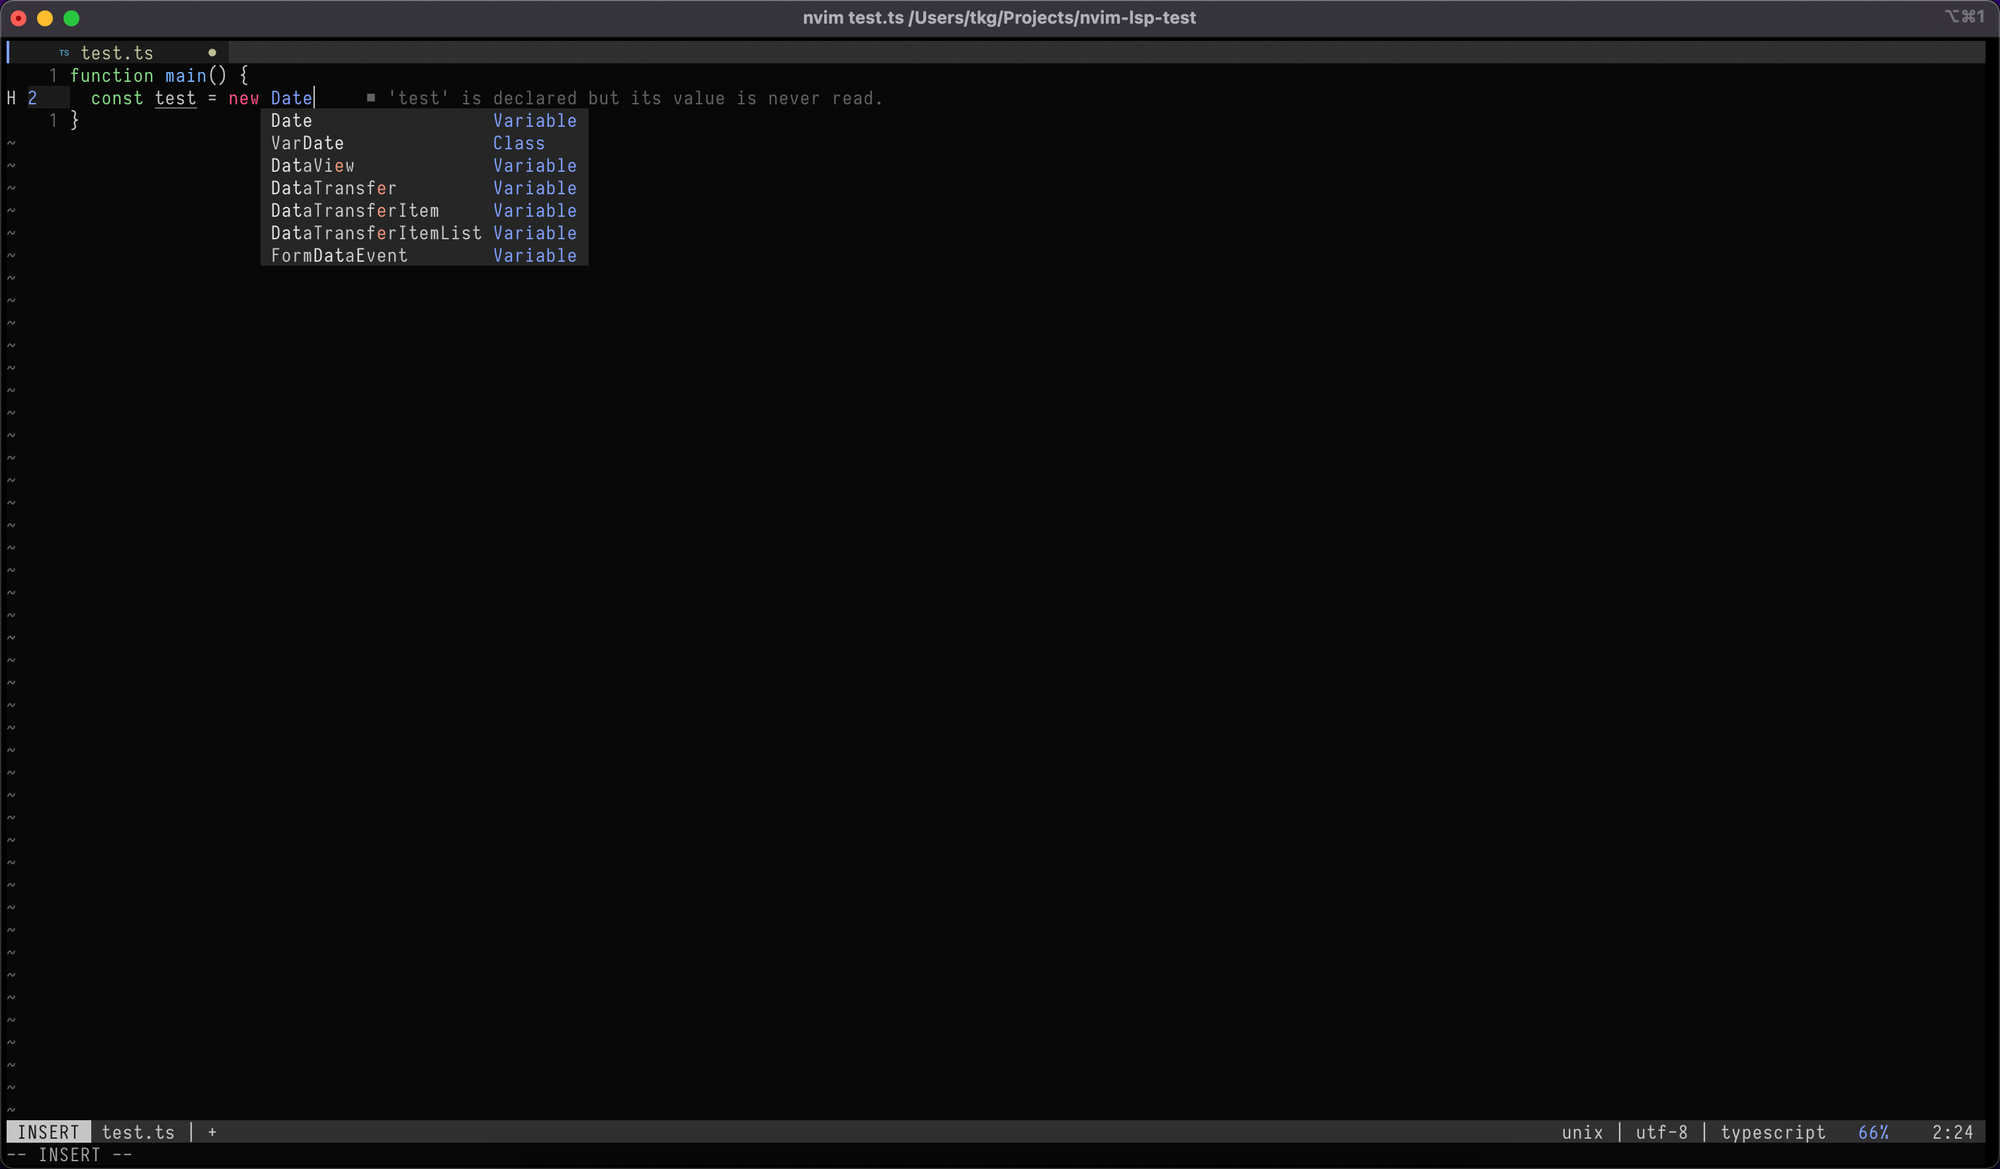
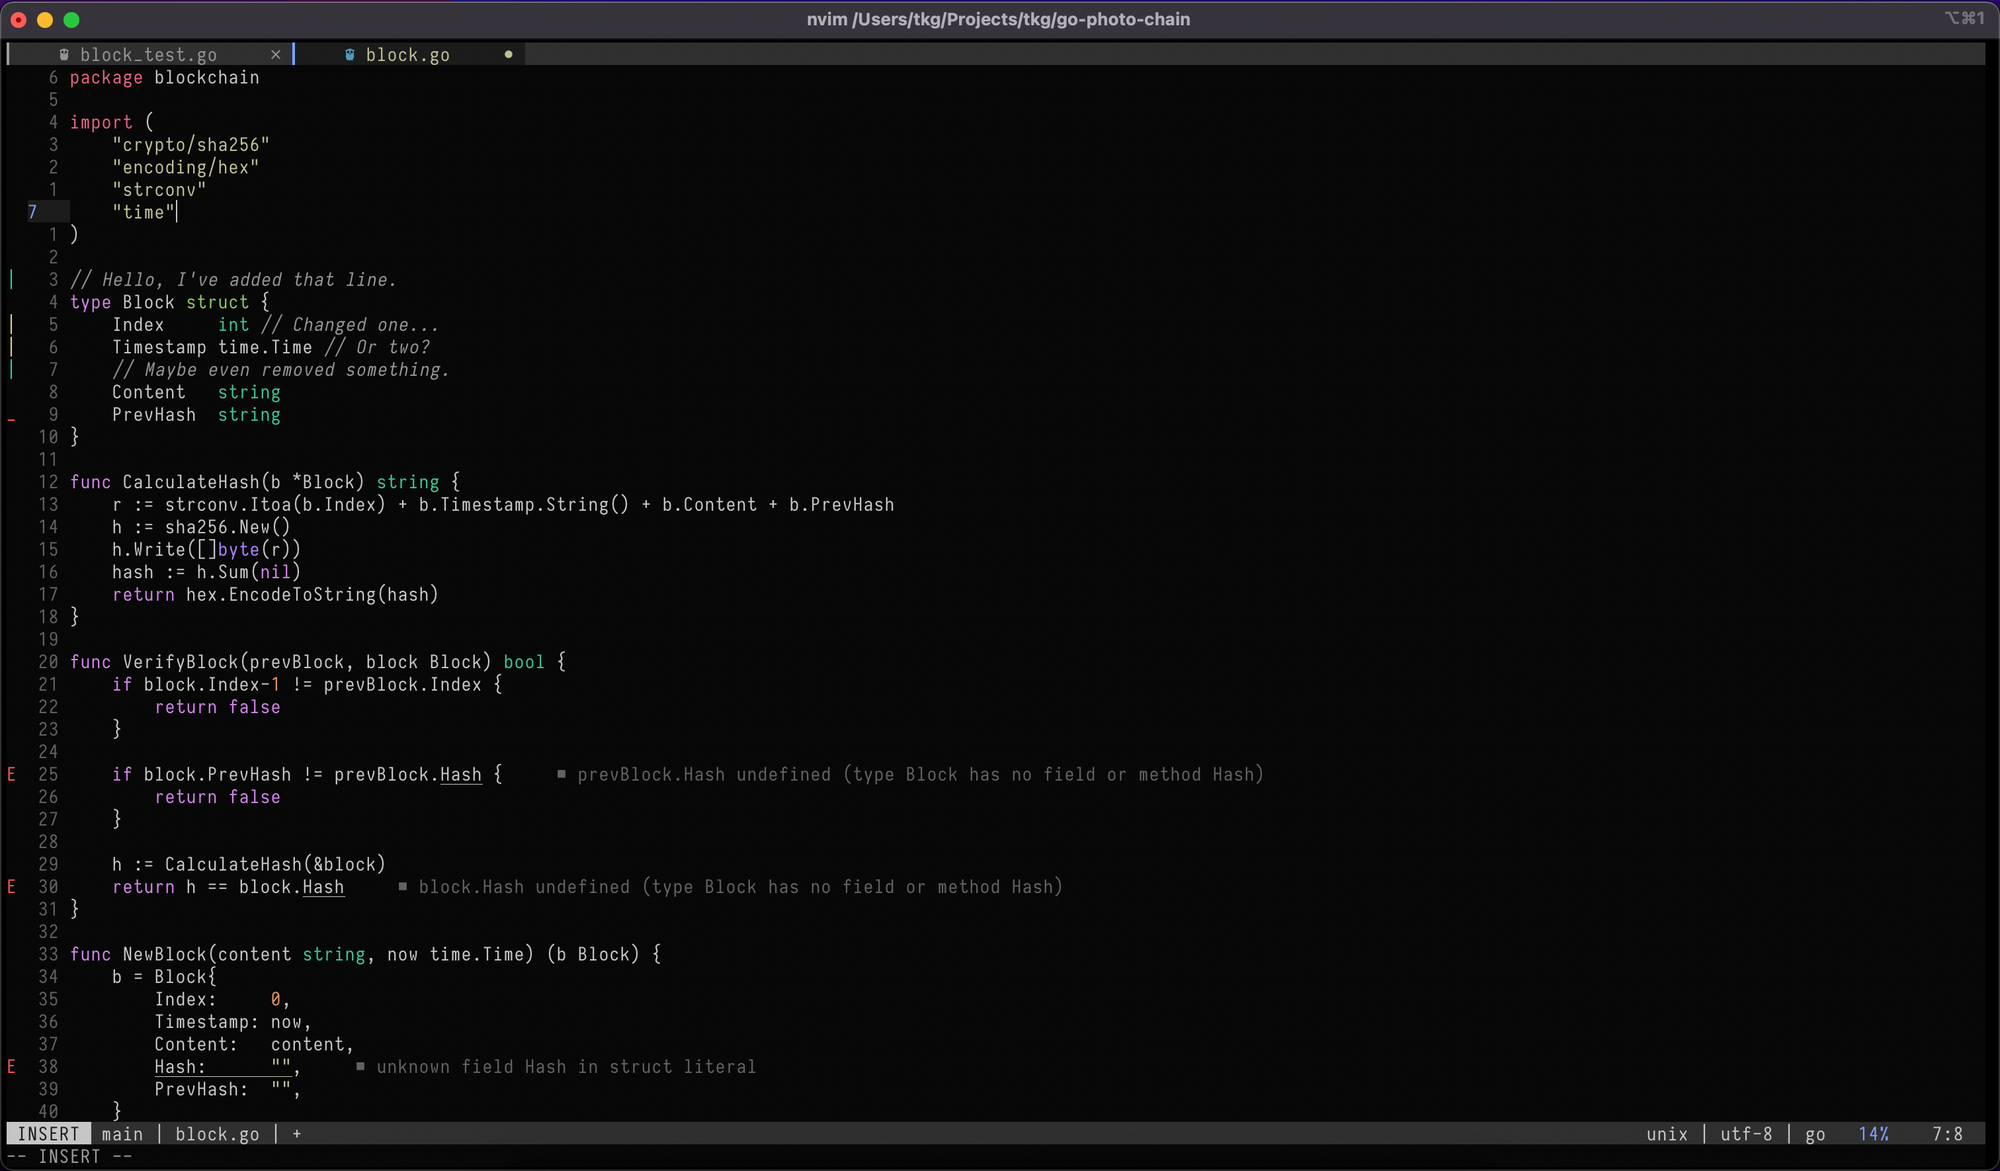
If you open a .ts file now you should have all the goodies like error messages, type hints, autocompletion, and other.
LSP Keybindings
Now, let’s go through some of those keymaps that you’ve just added to your configuration. I’ll try to explain and showcase the most important ones. Remember that, d and D are different. D means shift+d.
| Keymap | Effect |
|---|---|
| gD | go to Declaration |
| gd | go to definition |
| gr | go to references |
| gi | go to implementations |
| K | Works like "hover" in most text editors that support a mouse. When placed above a function or variable, it will show a tooltip with types and docs. |
| leader+rn | Rename the object that is currently under the cursor. It can be used for renaming functions, variables, etc. |
| leader D | Go to type definition. |
| leader ca | Open a code aaction menu. Quick fixes, refactors, etc. It's the same menu that would be opened by pressing the "lightbulb" in VS Code. |
Let’s move on to configuring some of the plugins we’ve installed. The most important ones will be treesitter, auto-completion and navigation.
Treesitter
treesitter is a parser tool, that builds a hierarchical syntax tree that is used internally by Neovim and various plugins to provide some crucial features like syntax highlighting and others. So let’s make sure to get it out of the way first.
I like to keep my plugins’ configuration separate, so under lua folder create a new plugs folder and then a treesitter.lua file. We'll keep each plugin's configuration in its own file.
-- Treesitter
-- Parsers must be installed manually via :TSInstall.
require('nvim-treesitter.configs').setup {
  highlight = {
    enable = true, -- false will disable the whole extension.
  },
  incremental_selection = {
    enable = true,
    keymaps = {
      init_selection = 'gnn',
      node_incremental = 'grn',
      scope_incremental = 'grc',
      node_decremental = 'grm',
    },
  },
  indent = {
    enable = true,
  },
  textobjects = {
    select = {
      enable = true,
      lookahead = true, -- Automatically jump forward to textobj, similar to targets.vim.
      keymaps = {
        -- You can use the capture groups defined in textobjects.scm.
        ['af'] = '@function.outer',
        ['if'] = '@function.inner',
        ['ac'] = '@class.outer',
        ['ic'] = '@class.inner',
      },
    },
    move = {
      enable = true,
      set_jumps = true, -- whether to set jumps in the jumplist
      goto_next_start = {
        [']m'] = '@function.outer',
        [']]'] = '@class.outer',
      },
      goto_next_end = {
        [']M'] = '@function.outer',
        [']['] = '@class.outer',
      },
      goto_previous_start = {
        ['[m'] = '@function.outer',
        ['[['] = '@class.outer',
      },
      goto_previous_end = {
        ['[M'] = '@function.outer',
        ['[]'] = '@class.outer',
      },
    },
  },
}
Note: There are some additional keybindings there, go ahead and check them out if you want to. I don’t consider them essential, though.
Let’s require this file in our init.lua.
-- GENERAL SETTINGS
-- Dependencies
require("plugins")
require("keybindings")
require("lsp")

-- Plugin specific configs.
require("plugs.treesitter")
Auto-completion
The next plugin on our list is responsible for autocompletion. We want to get handy tips and suggestions when we are typing. In our case, cmp will be responsible for that (using the LSPs as the backend).
Again, let’s make a separate config file lua/plugs/cmp.lua.
-- nvim-cmp setup
local cmp = require 'cmp'
cmp.setup {
  snippet = {
    expand = function(args)
      require('luasnip').lsp_expand(args.body)
    end,
  },
  mapping = {
    ['<C-j>'] = cmp.mapping.select_prev_item(),
    ['<C-k>'] = cmp.mapping.select_next_item(),
    ['<C-d>'] = cmp.mapping.scroll_docs(-4),
    ['<C-f>'] = cmp.mapping.scroll_docs(4),
    ['<C-Space>'] = cmp.mapping.complete(),
    ['<C-e>'] = cmp.mapping.close(),
    ['<CR>'] = cmp.mapping.confirm {
      behavior = cmp.ConfirmBehavior.Replace,
      select = true,
    },
	-- If you don't set up snippets in the section below, this might crash, either go through the "Snippets" section or remove any `luasnip` related code from this config.
    ['<Tab>'] = function(fallback)
      if cmp.visible() then
        cmp.select_next_item()
      elseif luasnip.expand_or_jumpable() then
        luasnip.expand_or_jump()
      else
        fallback()
      end
    end,
    ['<S-Tab>'] = function(fallback)
      if cmp.visible() then
        cmp.select_prev_item()
      elseif luasnip.jumpable(-1) then
        luasnip.jump(-1)
      else
        fallback()
      end
    end,
  },
  sources = {
    { name = 'nvim_lsp' },
    { name = 'luasnip' },
  },
}
Don’t forget to require this file in the init.lua config (require("plugs.cmp")).
As you can see, there are some new keybindings in there, let’s take a look at them.
| Keymap | Effect |
|---|---|
| ctrl+space | This will open the suggestions box, it works similarly to how VS Code’s autocompletion works. |
| ctrl+j | Select next suggestion. |
| ctrl+k | Select previous suggestion. |
| ctrl+d | Scroll the documentation window down. |
| ctrl+f | Scroll the documentation window up. |
| ctrl+e | Close the suggestion box (exit). |
Additionally, similarly to other code editors: Enter, Tab and Shift+Tab are used to confirm and select items.
Navigation
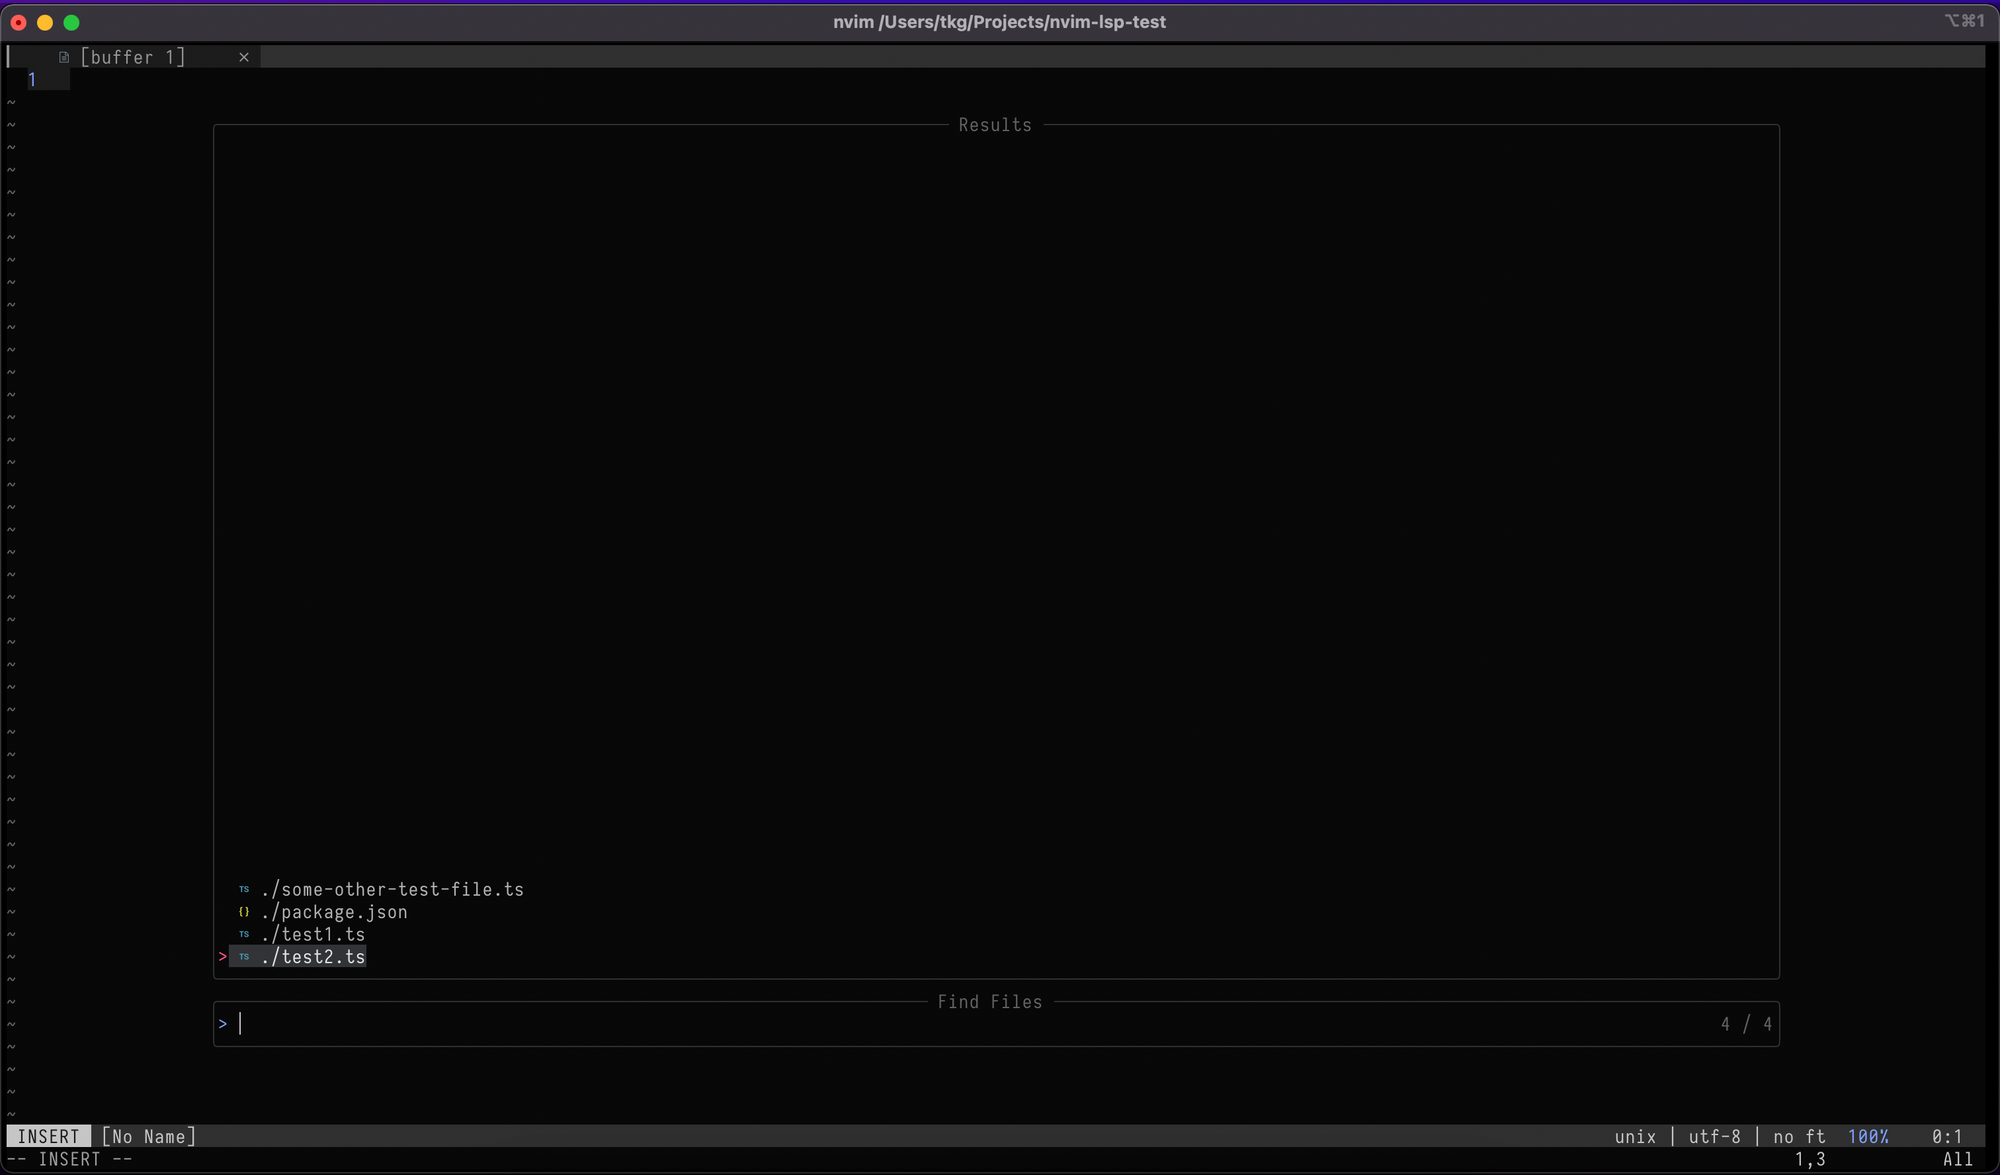
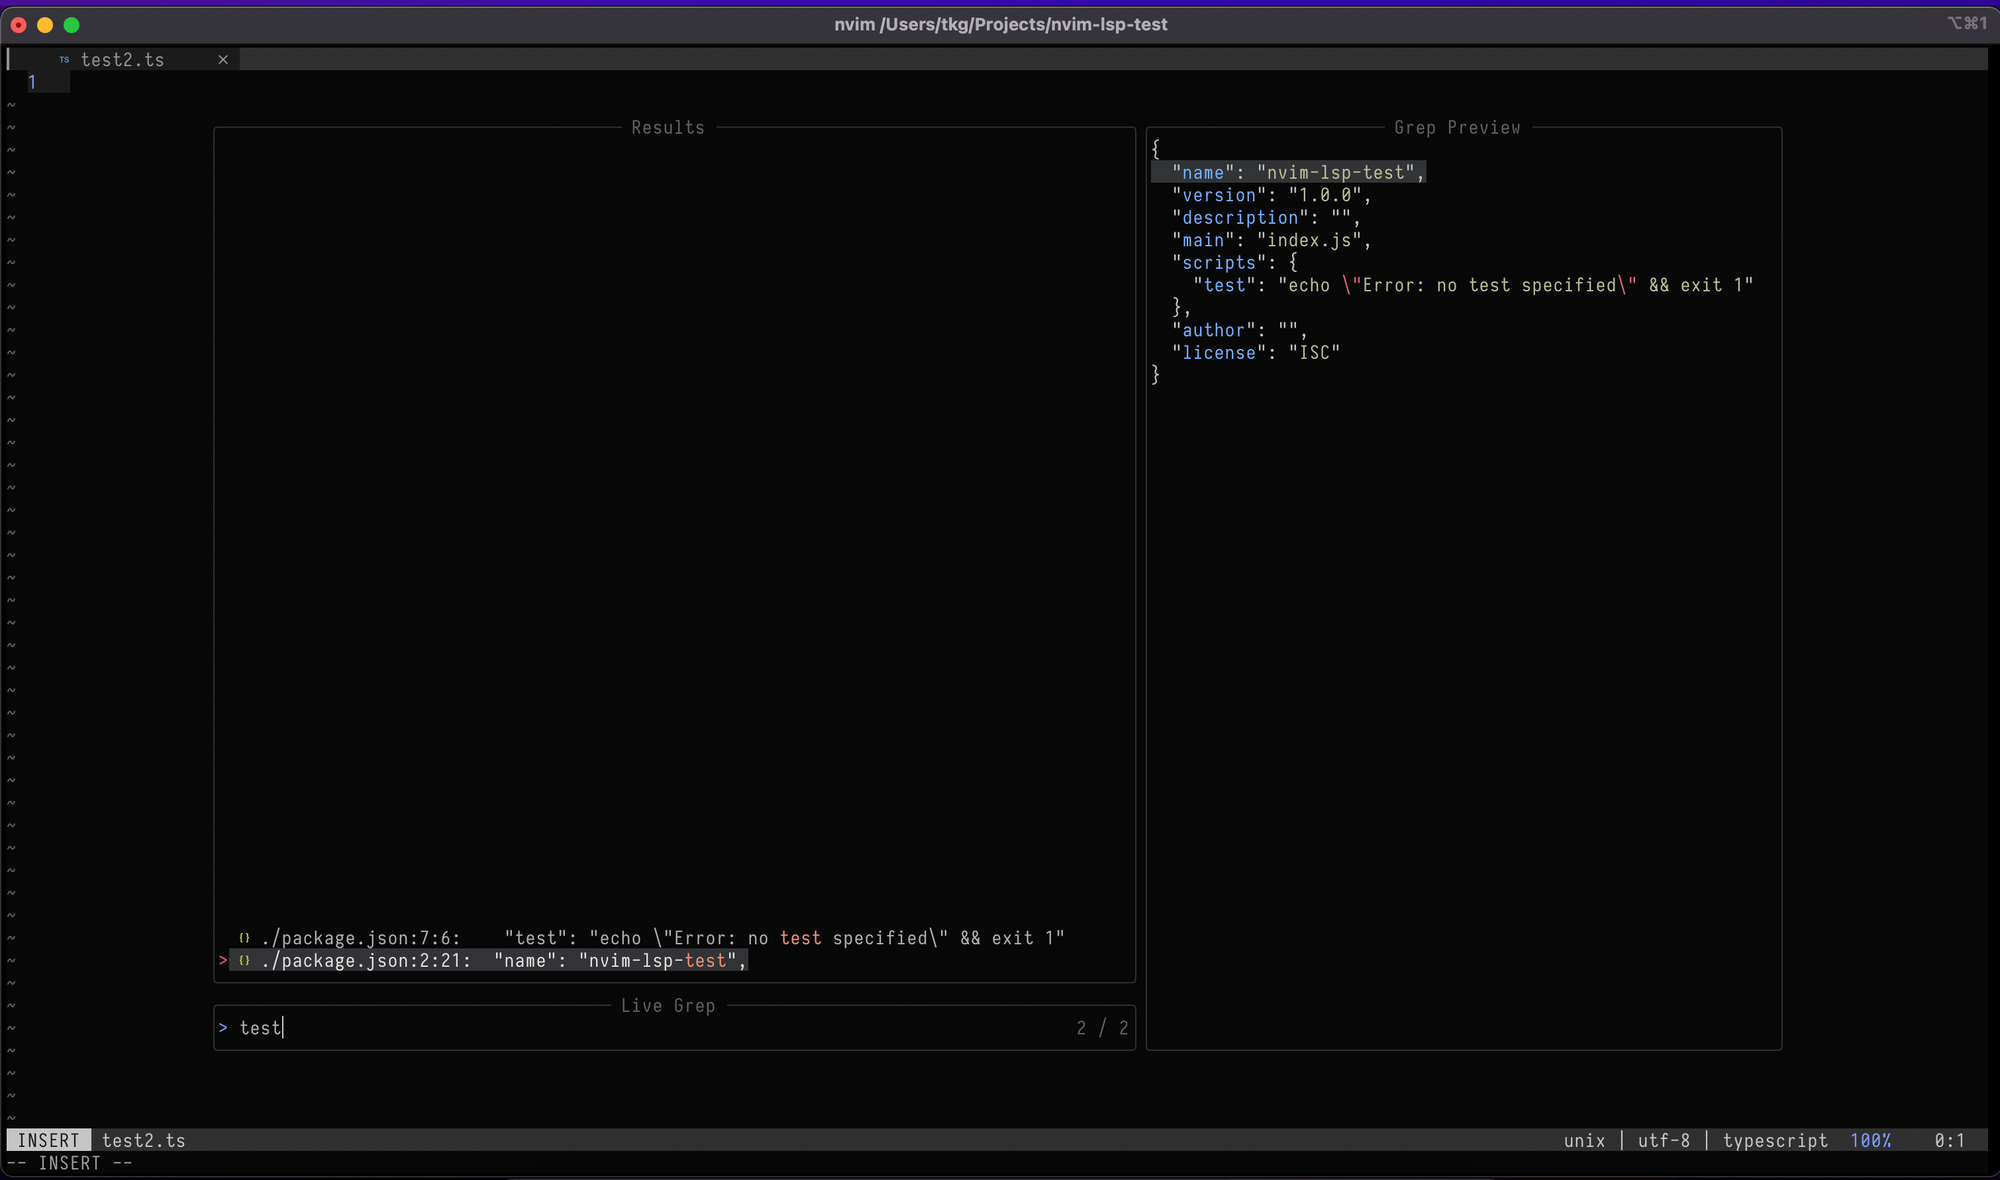
All that’s left is making sure we can quickly and easily navigate around our code and between our files. We have a plugin for that too. I use telescope with ripgrep as a backend for searching through my codebases.
In lua/plugs/telescope.lua, let’s add our plugin configuration.
-- Telescope
require('telescope').setup {
  defaults = {
    mappings = {
      i = {
        ['<C-u>'] = false,
        ['<C-d>'] = false,
      },
    },
  },
}
-- Add leader shortcuts.
vim.api.nvim_set_keymap('n', '<leader><space>', [[<cmd>lua require('telescope.builtin').buffers()<CR>]], { noremap = true, silent = true })
vim.api.nvim_set_keymap('n', '<leader>sf', [[<cmd>lua require('telescope.builtin').find_files({previewer = false})<CR>]], { noremap = true, silent = true })
vim.api.nvim_set_keymap('n', '<leader>sb', [[<cmd>lua require('telescope.builtin').current_buffer_fuzzy_find()<CR>]], { noremap = true, silent = true })
vim.api.nvim_set_keymap('n', '<leader>sh', [[<cmd>lua require('telescope.builtin').help_tags()<CR>]], { noremap = true, silent = true })
vim.api.nvim_set_keymap('n', '<leader>st', [[<cmd>lua require('telescope.builtin').tags()<CR>]], { noremap = true, silent = true })
vim.api.nvim_set_keymap('n', '<leader>sd', [[<cmd>lua require('telescope.builtin').grep_string()<CR>]], { noremap = true, silent = true })
vim.api.nvim_set_keymap('n', '<leader>sp', [[<cmd>lua require('telescope.builtin').live_grep()<CR>]], { noremap = true, silent = true })
vim.api.nvim_set_keymap('n', '<leader>so', [[<cmd>lua require('telescope.builtin').tags{ only_current_buffer = true }<CR>]], { noremap = true, silent = true })
vim.api.nvim_set_keymap('n', '<leader>?', [[<cmd>lua require('telescope.builtin').oldfiles()<CR>]], { noremap = true, silent = true })
Require this file in the init.lua and then let’s take a look at what kind of new keymaps we just got.
| Keymap | Effect |
|---|---|
| leader space | Opens the telescope UI and searches through the names of your open buffers. In other words — use this to jump between your open files. |
| leader sf | Search through project files. Telescope will search through the names of all the files in the current directory. Useful to open new files. |
| leader sp | Search in the whole project. Works like SHIFT+F in other text editors. |
However, some of them will require ripgrep to be installed on your system. On macOS, you can install it via brew install ripgrep.
Git
The last plugin we’ll configure is the gitsigns plugin. This will add great-looking git information in near the line numbers about whether a line was added, changed or modified. I find that particularly useful.
In lua/plugs/gitsigns.lua we’ll set up our plugin, as well as what symbols to use. You can choose different ones, like + if you prefer, of course. Don’t forget to require("plugs.gitsigns") in init.lua!
-- Gitsigns
require('gitsigns').setup {
  signs = {
    add = { hl = 'GitGutterAdd', text = '|' },
    change = { hl = 'GitGutterChange', text = '|' },
    delete = { hl = 'GitGutterDelete', text = '_' },
    topdelete = { hl = 'GitGutterDelete', text = '‾' },
    changedelete = { hl = 'GitGutterChange', text = '~' },
  },
}
We’re done!
After all of this setup, we have our editor setup done. Go ahead, try it out. I use it daily in my job as well as for any personal projects I create. I hope this guide we’ll serve you (and my future self) well. As you can see, setting up Neovim is not as intimidating as some people make it out to be.
If you have any feedback or questions, don’t hesitate to DM me (or mention me) on Twitter.